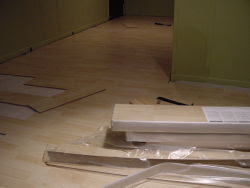
Laminate wood flooring is an excellent alternative to natural wood flooring with a few key benefits:
1. Price - As more manufacturers get into the market, the quality of the products available goes up and the prices come down.
2. Ease of Installation - Installing laminate flooring is incredibly easy. In fact, some friends of mine who were expecting a baby installed the flooring themselves throughout their house with relative ease. This is saying something considering my friend usually calls upon me for any task that calls upon using power tools! Truthfully, I helped him out at the very beginning, but once he had a little faith in himself, he had no problems.
3. Nearly Maintenance-Free - Laminate flooring resists staining, wear, and fading much better than wood and natural stone. It's very durable (about 10 times stronger than a kitchen countertop) and is water-resistant (since it is made of wood, however, it will still swell and buckle in areas of excessive moisture, so care should be used to adhere to spacing, and the use of glue is recommended). Unlike most hardwoods, laminates are virtually dent resistant, but matching fillers are made in case of gouges or dents. Laminate flooring requires little maintenance. You won't have to wax or oil your floors, have them sanded and restained, or screened and recoated.
How to Install
For my descriptions, I'll assume you are working from left to right, and that you are working with a glueless laminate flooring in an area not prone to excessive moisture. In areas prone to moisture (entry ways, halls outside of bathrooms, and utility closets) I advise gluing all panels. This will help prevent water penetrating to the core of the panels.
1. Prep the floor. If you can't remove the furniture from the room, move it to one side, try to give yourself a good 6-10 feet of room to work . You should plan to run the flooring along the wall offering the most light. Laminate flooring can be laid on top of most existing flooring provided it is sound, and level.
2. Install a vapor barrier. This is a thin foam mat coupled with a sheet of plastic that you can buy at any flooring provider. It will help prevent moisture from the sub-floor surface penetrating the laminate as well as provide a cushion and sound baffle so the laminate doesn't "bounce" or "pop" off the sub-floor. Most will come with a self-adhering tape to join the strips together.
3. For the first row you lay down, lay two panels close together end to end with the long tongue facing you. Cut a panel in half, using either a table saw or a circular saw at an appropriate work table, and lock in the right-hand half below the first panel in the top row. Always use caution, and wear safety goggles and respirator masks when cutting.
4. Lock in a full panel in the row you started with the half to bridge the two initial panels above. Now, using your tapping block (Hard plastic block shaped to not damage laminate) and hammer, tap the right-most panel in the top layer to lock into the panel to its left, and then repeat for the row below. Continue to use this bridging technique for the first row.
5. When you get to the end of the first row, where a full panel will not fit you will need to measure and cut a piece to fit: a. using a full panel, rotate the panel by 180 so that the long tongue is facing away from you, b. line the panel up where you would like the panel to end, giving yourself enough clearance to lock in place, c. using the end of the last board, mark on the panel you're going to cut using a straight edge (hint: I usually end up using that second half of the first board we cut as my straight edge, and thickness guide for cutting the door frames, etc). Cut the piece, position, and tap into place using a hammer and drawbar (metal bar shaped something like a "Z" to allow you to pull in end pieces).
6. Using the other portion of the panel you just cut, begin your next row. Some instructions say you should never use a piece shorter that 16 inches.
7. Continue in this fashion until you complete the room. Unless you're really lucky you'll probably need to "rip" all of your last row to fit. Here's where those with table saws have an advantage, but you can still do it with any other saw. Simply flip the panel over and like measuring for the end pieces, you'll measure for the remaining strip for the length of the panel.
8. There you've laid the flooring, now all you need to do is install toe molding (quarter round) to cover the clearances you left for expansion. Use care to attach molding to shoe molding, wall studs, or even the subfloor: NOT the laminate.
Addition note: For larger rooms (larger than 40 feet x 25 feet) you may need to install expansion joints, so that the entire floor will not be continuous but separate floating floors bridged by a strip that covers the gap, like you'll be using at the thresholds. For most homes, however, this won't be necessary if you do each room and hallway separately using the threshold strips to bridge the gaps.
Jan 30, 2007
How To Install Laminate Flooring
Subscribe to:
Post Comments (Atom)
No comments:
Post a Comment